Wednesday, March 27, 2013

Class 3 Collab pt.1

So you wanna do a collab, huh?

If you're reading this, then you likely chose to take the Class 3 Collaborative! Good choice! I can give you some tips based on my experience last term.

Let's break down what you'll be doing this term (assuming the curriculum is the same as min was!).

At first you'll spend a couple weeks animating your own shot. You'll pick from a list. This shot is pretty much to get your animation gears going while you wind up for the BIG ONE!

Let's fast forward a bit. For the collab, as a class you will come up with some ideas. Then you will get to pitch your own version of the idea. Don't be sad if your idea doesn't get chose (mine wasn't!), your mentor knows what they are doing.

After the overall scene is locked in, you will get to work on some previz...aka Previsualization. What this means is you will roughly layout your camera, staging, and character movement. After you get the OK from your mentor, you'll make the adjustments necessary and start your blocking.

That's where your journey begins. You will have several weeks of blocking, splining, and polishing. And let me tell you, it's really great!

Here's a great example of animation progression:


There are two main things I wanna talk about this week for your collab. Even though you start the collab scenes in a few weeks, you gotta start thinking about it now.

Time Management:

Now more then ever do you need to make sure your workflow is steady and scheduled. I have the luxury of a wife with a steady job, so I can spend less time at work and more time animating. Some of you work 40 hours a week, have kids, and all sorts of extra stuff. Ultimately it will be up to you schedule your time. I get up at 6am, go for a run (I can't stress how productive this has made me. Exercise gets your body and brain on track), and after a shower and breakfast I usually sit down to work around 7am. I schedule my time as if it were a real job. from 7am to 4pm, I work on my projects in some manner. I make sure to take a break every hour or two to stretch for a couple minutes. And I take a one hour lunch to get away from the computer as well as three 15 minute breaks for fun (be it more stretching/exercise, video game, tv show, or just relax).
The breaks are important, you don't wanna burn yourself out...you'll get plenty of that in the final two weeks!

Teamwork:

My class made a Google+ group. We met an hour before every Q&A and posted to our page constantly. I never felt so close with a class before. And in my opinion that made all the difference in the world.
You're going to be working with these people, so learn to like each other! :)

Make sure to post to your PR constantly. That way you can get feedback.


I'll be back with more blog posts about the collab (hopefully) soon. Notes I want to hit:

-Retexturing Stewie (or are you all using the new AM rigs?)

-Getting props and integrating them

-The reference editor

-Hooking up shots


Oh and one more thing. A tip for AMP in case you want a shortcut:


Good luck this term!

Saturday, March 2, 2013

Class 1 Week 11


Howdy everyone! It's week 11 and we're almost done! But not so fast! You gotta spline those character walks.

So you sit down at your computer, and re-watch your blocking. It looks cool. It makes sense. The timing works and you're excited. Then you select all your keys and convert to spline.
Play that animation back and.....uh oh, what happened?! It's all mushy and slow and why is this happening?!

Well first and foremost, take a deep breath and stay calm. Organized chaos is what animation feels like sometimes, huh? You block it all out, and then blow it up! Finally you piece it back together.

Here's some advice that I try to remind myself of from time to time:
Blocking is merely your guideline. Don't fall in love with it, because you'll be changing a lot of things.


oh boy....


Take one thing at a time. By the end of this week you'll have smoothed those curves, nailed the feet, fixed the overshoots, and delete unnecessary keys. But once again, one thing at a time!

Here's a great Trooper Tip from Anders Ancker that will help you tremendously when working with splines. I know he says Week 12, but this helps this week :)


I was always told to start with the main force, in this case the hips. Regardless of what your character walk is like, try and think of your hips as a bouncing ball. Now maybe your walk is fast, slow, hangs in the air a long time, or whatever. You'll just make that bouncing ball bend the rules a bit.
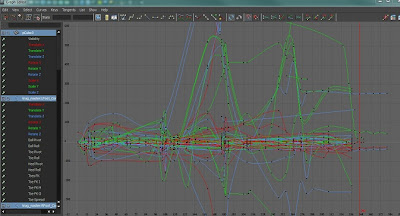
Next open up your graph editor and work on one attribute at a time. For instance I like to start with the Translate Y.

Flatten the highs and lows first. You don't want any overshoots because it might break the rig at the ankles. Next I like to smooth out EACH AND EVERY key so that the tangents are smooth along the curve.

So you may start out with a curve like this:


Then you smooth it out and it will look like this:


Eventually you will go in and delete keys and work with the curve itself, and it may look like this:


But don't delete keys yet! Just smooth those curves. It's easy to delete them later, but harder to get them back if you need it!

So I do this for each attribute for the hips.

It sometimes helps to hide Ballie's legs to focus on the hips. To do this, Select Ballie's MAIN control (The nurbs circle on the ground around him). In the channel box you'll see two attributes: Left and Right Leg Visibility. Click them both to OFF and there you go!

Once you think you have the hips nice and smooth, work on nailing down the feet.
Flatten the keys where the feet should be on the ground and smooth out each attribute like you did to the hips.

Here's where I recommend playblasting your animation and posting it for public review. Find out if any of your timing needs to change and try not to fret, this is only spline pass number 1! Out of....ONE MILLION! MWAHAHA! Well maybe not that many :)

Take a break and when you feel comfortable with any feedback received, start your next spline pass.

Now you can start deleting keys and making the tangents take care of those wide and shallow curves.

Good luck this week and let me know if you have any questions!

~Bsly

Class 1 Week 10


Hello everyone! The term is drawing to a close, and things get hectic! So for anyone out there struggling or stressing out, “Keep your chin up. Someday there'll be happiness again in Nottingham, you'll see.”


Check out this video from my favorite Disney movie. After watching it for fun, go back and watch the first 10 seconds or so. These walks have some cool character to them! And that's what Week 10 is all about for class! Walks with STYLE!

This week you get to be a little creative...or a lot! Before I get started with some tips I have for you, check out this Trooper Tip, it may or may not be useful this week, but its a good tip to know:


Courtesy of Anders Ancker as usual :)


Ok so what does it mean to add character? For this walk cycle I recommend planning a lot..well you should always plan a lot :)

--Is your character male or female?
--Light and nimble? Or Heavy and slow?
--Happy, sad, excited, depressed, sick etc.

Next think about how you would act if you meet some of these criteria. If you are light and peppy, are you super bouncy? Or do you make a long stretchy stride, etc.


There's some long strides, athletic, drunk, and a few more I think. This can give you some inspiration.

Next thing I want to emphasize: KEEP IT SIMPLE! When I did this character walk, I wanted ballie to walk thru a puddle, and flick his foot, and blah blah blah. Well it turned out not so good :)
So don't overcomplicate your walk cycle.

That's the next tip: Do a walk CYCLE! Animate a walk that could technically be played over and over, and it appears as if Ballie just keep walking to that style. If you add in some weird stuff it might not work as a cycle. For instance my foot flick, not only did it look too jerky, but it doesn't work well as a cycle.

Another huge tip this week is don't forget to observe. It might be kind of weird to go to the mall and watch people walk around, but it is very useful! See how people compose themselves under their circumstance. Do they have a limp? Or maybe a little girl is skipping circles around her super tired parents. Don't ever stop observing! I struggle with this, and I'm sure some of you may as well. It comes with time and practice.

So go to the mall, watch some cartoons, and have fun with this project.
Before you EVER even open up maya, I highly recommend you know what kind of walk you want to do. I know first hand how hard it can be when you open up maya and you only kinda know what you wanna do...it's a pain! Plan plan plan!

I hope some of these tips are useful and let me know if you have any questions!

~Peer Trooper Brandon

Tuesday, January 8, 2013

Class 2 Week 2

Howdy, howdy, howdy!
I hope you are enjoying being back at AM! So you spent all last week planning and now you get to dive back in!

First off I hope you picked a good shot from the list! Well ok anything you pick can turn out good as long as you animate it well...


There are two things I want to talk about today: Workflow and Ergonomics.

First workflow. When I transitioned into class 2, I didn't do much at first to define my workflow...well I struggled for a while. Let me tell you that defining your workflow is an extremely important thing to do.

So what is workflow? Well there's a lot that goes into it. Probably the most important thing is TIME MANAGEMENT!
You can know exactly how you're going to sketch, animate, and yada yada. But if you don't know WHEN you are going to? You will struggle. I know I did.

Set yourself daily goals. Or better yet, set yourself DEADLINES! Mwahaha! Let's say you want your first pass of blocking on your public review by Tuesday. And then second pass of blocking for frames 1-50 on Wednesday. Rinse and repeat until "Final" blocking finished by Saturday evening. 
i like to turn in my stuff the day before the due date. Why? Well first and foremost it gives me a day off. Sunday is a relaxing day. Second, it gives you a chance to receive any last second feedback that you may want to implement, or even save for the following week.

So what other things go in to workflow? Well I could sit and lecture you all day, but I'll be honest - I'm still developing my own workflow. So Leave it to the professionals: 

I highly recommend that you Click Here and watch these Student Workflow videos. you'll be glad you did!


Ergonomics seems to be a thing brought up a lot so I wanted to talk about my approach to keeping myself healthy while animating.

There are the obvious things such as:

In the past I have experienced pain, discomfort, or an injury to my right wrist, elbow, and shoulder (more specifically rotator cuff).

To alleviate my wrist problems, I started animating using a Wacom tablet. I personally bought an Intuos 3 off of craigslist. Once I stopped using a mouse I stopped having wrist pain and discomfort.

For my elbow, it was crucial that I kept a proper reach. Just like in the news video, I made sure not to stretch out my arm too much, as well as not tucking it in too close. The biggest thing that helped me with my elbow was to stop using the track-pad on my laptop. I animate on a desktop, but whenever I was on my laptop I used the track-pad which caused a temporary tendinitis. I stopped using my laptop all together since it broke....but If it still worked I would use a mouse or Wacom.

Finally my biggest issue was with my shoulder. I had injured my rotator cuff at a job and had to do some physical therapy. While doing the therapy I discovered that I had a really weak shoulder system. I learned a lot of exercises to strengthen them and I have felt much better since. The biggest exercises I learned are demonstrated in this video:


I highly recommend that you also set yourself an alarm or timer. Let's say every 40 minutes you take a 10-15 minute break and just walk around, have a snack, relax your body, etc. And for your eyes I also highly recommend looking outside into the distance to give your eyes a break from looking at something so close with intensity.

I hope these tips are helpful!

~Bsly

Wednesday, January 2, 2013

Class 2 Week 1


Hello all! Welcome back. I hope you enjoyed your break!

First off a great tip from Anders Ancker that you should already know :)


I think you will find class 2 to be much more challenging that class 1; however, it is also much more rewarding. It is important to remember to keep it simple this term. I know broken record...But seriously.

One of the most exciting things this term is that you get to choose your project from a list.
You'll see that they are ranked by difficulty, but don't let this fool you. Even the easy choices can be challenging. The best advice I have for you is to pick out a few from the list that sound the most interesting to you. Next act them all out and really imagine how you would animate it.

How do your hips rotate? In what ways do you make sure you are balanced? You will be using Ballie for this assignment, so try not to use your arms too much.

Once you think you have a decision, film some reference! Here's an example of how I like to film reference. Not everyone has a camera, let a lone two; but I use a cheapo flip camera combined with my cell phone camera.


Now there's one very important thing to consider: Some cameras film at different frame rates. So this reference isn't perfect because I forgot to convert it. Normally this is how I approach reference:


After filming, I open it up in Quicktime Pro. I then follow AM's video standardization, which I hope you all still know how to do :)

NOTE: If you don't have After Effects or are completely unfamiliar with it, you may want to skip this tip.

Once I export the videos, they are in 24 fps. If for some reason the frame rate doesn't convert properly, I follow this Tutorial for After Effects

I like to composite my reference in After Effects, sync up the video by clapping your hands :)
Here's how I add a frame counter:

Layer → New → Adjustment Layer
Effect → Text → Timecode

Then in your effects controls change the display format to “Frame Numbers”, and the Time Units to “30” Then you can adjust the position and size of the timecode!

Once your video is all composited, add to render queue (ctrl+shift+/), and I like to output module to be Quicktime format, and choose where to save the video, finally render.

It's a lot of work but it's nice to have good reference.

For those of you who either don't have AE or don't know how to use it, it shouldn't be to hard to do this in any movie making program. Of course you don't have to composite them at all :)

Next DRAW, DRAW, DRAW! Draw out your poses as best as you can following your reference.

That's all you have for the week I believe. Good luck and let me know if you have any questions!

~Brandon

Class 1 Week 7


Here's a really cool Trooper Tip from Anders Ancker: (I know he says week 4, but this is a very useful tip for animating with Tailor)


Pretty cool! Now Just because everyone wants to animate Tailor doesn't mean you have to. You can also animate One-Leg. I chose Tailor because I wanted to further develop my overlapping skills which is more obvious with the Tailor rig.

So if you are animating Tailor here are some tips:

Keep the pendulum in mind. There will be successive breaking of joints. Always. You should have a really cool trick you'll learn in your lecture about copy and pasting keys, and the offsetting them for a good start. But don't stop there!

The one thing my previous mentor told me and it really helped: think of Tailor like a roller coaster. The tail will stay on the “track” behind the body. I had the issue of having the tail “come off the track” on each bounce and it looked silly.

Also this week, you get to add a little bit of character to your scene. Is Tailor a zippy Squirrel? Is he heavy? Etc.

Please keep it simple though. This was the assignment where I saw a lot of students try and get extra creative. Check with your mentor fist. My mentor told my class that we were to animate a bouncing ball with a tail. Of course we added in some character, but it wasn't some complicated scene where Tailor tries to take over the world.

I think that's all for today. Please message me if you have a question though!

~Peer Trooper Brandon

P.S. Real quick, if you choose one leg, the only tip that think you need to keep in mind at all times: Pay attention to the center of gravity. He's only got one leg so he's going to need to be balanced at all times :)

Class 1 Week 6

Hey everyone! It's week 6 and you know what that means!

More Trooper Tips! First of all, congratulations on making it halfway thru the term! Keep on working hard and before you know it we'll be done for this class!

So what's in store for week 6? The Pendulum! This project is really about nailing down the idea of overlapping action.
You'll learn about successive breaking of joints and let me tell you this is a big one! Well ok all of the principles are important. :)

Anh Huynh Has a really great Blog about this week. And here's a great illustration about successive breaking of joints:


Make sure you plan this week! Draw as much as you can to try and nail down that overlapping idea. What I did to really help me visualize the joints was to draw them using different colors. So get out your colored pencils or crayons wooo!


Try your best this week to not make the joints too jerky, or look like they hit an invisible wall. My mentor let me know that this assignment really needed to be “loosey goosey”.

I took the “layering” approach to animation with this project.

--I planned out the path of my pendulum, and then animated just the platform. Hide the joints if it helps you visualize it better.

--I did my best to really nail down the path and the ease ins and outs of the pendulum, tracking my arcs.

--Then I started on the closes joint. I rotated it at key points, and tweaked it from there.

--I copy and pasted the keys from the first joint to each joint, and offset the frames by one frame. This gave me a good starting point to work with, then you'll have to spend lots of time tweaking each joint.

By the way, don't know how to track your arcs?

Click Here and download "AM! Menu" If you haven't already done so. Read the instructions on how to install it.

When in Maya, use the arc tracker tool:


It's the tool on the left next to the red pencil.
To use it:

-Select the object's main control handle
-Click the arc tracker
-Type in your frame range
-Re-scale it to 0.200, that way it's not too big
-click create


Now you have a nice visual image of your object's trajectory.

I hope you learned something this week and good luck on your project!

~Peer Trooper, Bsly